Maintaining RV window seals is essential for both comfort and safety. Over time, seals can crack or shrink, leading to drafts, leaks, and noise. These issues compromise the RV’s energy efficiency and performance, affecting your overall travel experience. Moreover, damaged seals can lead to water damage, which might result in costly repairs. That’s why knowing “tips for repairing or replacing RV window seals” is crucial for every RV owner. In this guide, we’ll provide practical advice to help you address these problems, ensuring your motorhome remains comfortable, efficient, and visually appealing. Furthermore, tackling seal issues early can prevent structural damage and maintain your RV’s value.
Identifying Issues with Your RV Window Seals
Maintaining your RV window seals is crucial for a comfortable, safe journey. Over time, wear and tear can lead to damage, which affects both the aesthetics and performance of your vehicle. Recognizing the signs of deterioration early can save you from costly repairs and ensure you have a pleasant experience on the road. Let’s explore how to spot issues with your window seals and why timely repairs are essential.
Common Signs of Wear and Damage
One way to identify problems with your RV window seals is through visual inspection. Cracking, hardening, or shrinkage indicate aging or exposure to the elements. If you notice any of these signs, it’s time to consider repair or replacement. Additionally, auditory cues such as increased noise or drafts coming through the seals suggest that they might not be airtight. This can compromise the comfort and energy efficiency of your vehicle, leading to higher energy costs and reduced overall performance.
Why Timely Repairs are Crucial for Motorhomes
Delaying repairs can lead to more significant issues down the road. Water damage is a critical concern, as it can affect the interior structure of the vehicle, resulting in mold or rot. Furthermore, inefficient window seals can lead to heat loss or gain, making it harder to maintain a comfortable temperature inside. This not only affects comfort but also increases energy consumption. In the long run, neglected seals can cause structural issues, necessitating more extensive and costly repairs.
Timely repairs help maintain the value of your RV, keeping it in good condition for future trips. Addressing these issues early on prevents further damage and ensures your motorhome continues to serve you well.
Deciding Between Repair and Replacement
Choosing whether to repair or replace your RV window seals depends on the extent of the damage and your budget. While minor issues might be addressed through repairs, extensive wear or outdated materials may require replacement. This section will guide you in making an informed decision.
When to Repair Your RV Camper Van’s Window Seals
Repairs might be sufficient for minor damage, such as small cracks or shrinking seals. If your budget is tight, consider this option to restore function and prevent further damage. Repairing can be a quick fix, allowing you to maintain comfort and energy efficiency without breaking the bank. Additionally, it can be a temporary solution if you’re planning a more comprehensive overhaul in the future.
When to Replace Your Trailer’s Window Seals
Replacement becomes necessary when seals show extensive damage or have become outdated. Old materials may no longer provide adequate protection, necessitating an upgrade. New seals can offer improved insulation, reducing energy consumption and enhancing comfort. In the long run, replacing worn-out seals can prevent recurring issues, maintaining the vehicle’s value and ensuring a smooth, enjoyable journey.
Choosing to replace seals over repairing them might require a higher initial investment, but it can pay off in the long run by preventing future problems and ensuring lasting comfort.
Both identifying issues and making timely decisions between repair and replacement are crucial steps in maintaining your RV’s performance. By addressing these concerns, you can ensure a comfortable journey, protect your vehicle’s value, and avoid costly repairs.
How to Repair RV Window Seals
Maintaining functional window seals is crucial for any RV. Repairing them can be a straightforward process with the right tools, materials, and guidance. This section provides a comprehensive guide to repairing RV window seals, covering both the necessary supplies and a step-by-step process. By following these instructions, you’ll ensure your RV remains comfortable, efficient, and visually appealing.
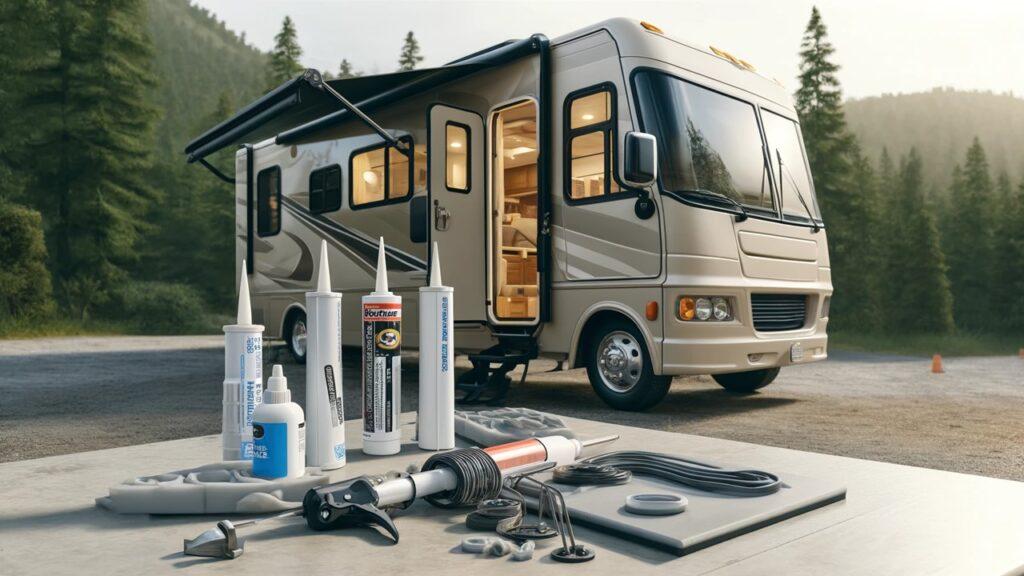
Tools and Materials You Will Need
Repairing RV window seals requires specific RV mechanics tools and materials. A utility knife or scraper is essential for removing old seals, while a wire brush or sandpaper helps clean the window frame. A sealant or adhesive, chosen based on compatibility with the window material, is crucial for securing the new seal. You’ll also need a caulking gun for applying the sealant evenly. Additionally, painter’s tape can help protect the surrounding area from excess sealant. Finally, a damp cloth is useful for cleaning up spills or smudges.
Step-by-Step Guide to Repairing Seals
Now that you have your tools and materials, let’s walk through the repair process step-by-step:
- Remove the old seal: Carefully use a utility knife or scraper to remove the existing seal from the window frame. Ensure all remnants are cleared away to create a smooth surface for the new seal.
- Clean the frame: Use a wire brush or sandpaper to remove any residue or rust from the window frame. This ensures a clean, secure foundation for the new sealant.
- Apply the sealant: Load the caulking gun with your chosen sealant. Carefully apply a continuous bead of sealant along the window frame, ensuring an even, airtight seal.
- Smooth the seal: Use a gloved finger or a smoothing tool to evenly distribute the sealant along the frame. This helps eliminate air pockets and provides a consistent appearance.
- Allow to dry: Let the sealant dry completely according to the manufacturer’s instructions. This step is crucial to ensure the seal’s integrity.
- Test for leaks: Once the sealant is dry, check for any drafts or moisture around the window frame. If leaks persist, apply additional sealant where needed.
This process, when followed diligently, can extend the life of your RV window seals and prevent costly issues.
Repairing your RV window seals doesn’t have to be daunting. With the right tools, materials, and guidance, you can restore your vehicle’s comfort, efficiency, and aesthetic appeal. Following these steps can help you address minor issues promptly, avoiding potential structural damage. By maintaining functional seals, you’ll enjoy peace of mind on the road, knowing your RV is in top condition. Furthermore, maintaining your RV window seals ensures a more enjoyable, worry-free journey for you and your passengers.
How to Replace RV Window Seals
Replacing RV window seals can significantly enhance your vehicle’s comfort and efficiency. This process may seem daunting, but with the right materials and guidance, it can be straightforward. Let’s explore how to choose the correct seal material and provide a step-by-step guide to replacing your window seals, ensuring your RV continues to perform at its best.
Selecting the Right Materials for Your RV Motorhome
Choosing the appropriate seal material for your RV window is crucial for ensuring durability and performance. Silicone and EPDM rubber are popular options. Silicone seals offer flexibility and resistance to UV rays, making them ideal for windows exposed to sunlight. EPDM rubber seals, on the other hand, are known for their resistance to weathering, making them suitable for windows frequently exposed to harsh elements.
For window types such as sliding or fixed, consider seals designed explicitly for these models. Additionally, take into account your RV model when selecting materials. Older models may benefit from more flexible materials, while newer models might require more rigid, modern options. Balancing material properties and RV specifications ensures a seal that meets your needs.
Step-by-Step Guide to Replacing Seals
Let’s walk through the replacing process step-by-step:
- Remove the old seal: Carefully use a utility knife or scraper to detach the existing seal from the window frame. Ensure all remnants are cleared away to create a clean surface.
- Clean the frame: Use a wire brush or sandpaper to remove any residue or rust, ensuring a smooth foundation for the new seal.
- Measure and cut the new seal: Measure the window frame’s perimeter and cut the new seal to fit, leaving a slight overlap to ensure a secure seal.
- Apply the new seal: Place the new seal along the window frame, pressing firmly to ensure adherence. For adhesive-backed seals, remove the protective backing before application.
- Seal the edges: Apply a bead of silicone or adhesive along the edges of the seal to reinforce the bond and prevent air or water leaks.
- Allow to dry: Let the seal and adhesive dry completely, according to the manufacturer’s instructions, to ensure a strong, airtight seal.
- Test for leaks: Once dry, inspect the window for drafts or moisture. If leaks persist, apply additional adhesive or sealant as needed.
Replacing your RV window seals with this process ensures a tight, durable fit, enhancing your vehicle’s comfort and efficiency.
Replacing your RV window seals might seem challenging, but with the right materials and guidance, it becomes a manageable task. Choosing the appropriate seal material based on your RV model and window type ensures durability and performance. Following this step-by-step guide will keep your vehicle in optimal condition, preventing drafts and leaks. Maintaining functional window seals is essential for a comfortable and efficient journey, making it a worthwhile investment for every RV owner.
Maintaining Your RV’s Window Seals
Keeping your RV window seals in good condition is essential for longevity and comfort. Regular maintenance can extend their life, preventing leaks, drafts, and costly repairs. This section offers tips for routine upkeep and troubleshooting common issues, ensuring your motorhome stays comfortable and efficient on the road.
Routine Maintenance Tips for Camper Van Window Seals
Regular inspection is key to maintaining your RV window seals. Check for visible cracks, shrinkage, or hardening, indicating wear and tear. Cleaning the seals periodically helps remove dirt and debris that could damage or deteriorate them. Use mild soap and water, avoiding harsh chemicals that may degrade the material.
Furthermore, consider environmental factors like temperature and humidity. Extreme heat or cold can cause seals to expand or contract, leading to cracks or gaps. Park your RV in shaded areas when possible, and use a cover during extreme weather. This helps protect the seals, extending their life.
Troubleshooting Common Issues
Despite routine maintenance, issues may arise. For example, drafts or leaks indicate a seal may have lost its integrity. In this case, inspect the seal’s condition and apply additional sealant if needed. Alternatively, replace the seal entirely if it shows significant wear.
Additionally, recurring problems may suggest underlying issues. Check for structural damage or warped frames, which could compromise the seal’s effectiveness. Address these concerns promptly to prevent further damage, ensuring your RV remains comfortable and efficient.
Wrapping It Up!
Maintaining RV window seals is essential for comfort, performance, and long-term value. By ensuring they are in top condition, you safeguard your motorhome against leaks, drafts, and costly repairs. Regular inspections are a must, allowing you to spot potential issues early and address them before they escalate. Cleaning the seals periodically also helps remove dirt, grime, and debris, preventing premature wear and tear.
Troubleshooting is another key aspect of maintenance. Seals can deteriorate due to environmental factors like temperature fluctuations, leading to expansion or contraction. Addressing these issues quickly, such as by applying additional sealant or replacing the seal entirely, keeps your RV’s interior protected. Additionally, monitoring structural concerns like warped frames or compromised fittings ensures the seals remain effective.
Preserving the seals’ functionality also enhances the vehicle’s efficiency, reducing energy consumption and maintaining an optimal temperature inside. This contributes to an enjoyable and relaxing journey, allowing you to focus on the adventure at hand. Ultimately, investing in the upkeep of your RV window seals protects your motorhome’s value, ensuring it continues to serve you well on future road trips. By prioritizing maintenance, you can enjoy worry-free travels, knowing your vehicle is in excellent shape for any adventure.
Related FAQs
How Do I Know My RV Window Seals Need Replacement?
Check for visible cracks, leaks, drafts, or hardened seals, indicating wear and tear.
What Is the Average Lifespan of RV Window Seals?
Typically, RV window seals last 5-10 years, depending on environmental exposure.
How Can I Prevent Damage to My Window Seals?
Regular cleaning, inspections, and avoiding harsh weather can extend seal lifespan.
Are There Specialized Sealants for RV Windows?
Yes, silicone and EPDM-based sealants are commonly used for RV window repairs.
Can I Replace RV Window Seals Myself?
Yes, with the right materials and tools, you can repair or replace seals independently.
As outdoor enthusiasts ourselves, we understand the significance of reliable gear that can withstand the elements and support you throughout your journey. We try to provide as much real life information with our guides and how tos to the readers as possible. Our honest and transparent reviews of essential outdoor gadgets and products are rooted in testing and experience. We take great satisfaction in offering unbiased evaluations, ensuring that you can make informed decisions when investing in outdoor gear. As an affiliate website, we may earn a small commission from some of the products we feature. However, rest assured that our opinions are not influenced by this, and your trust is always our top priority.


